Create a Shared Family Address
Book with Contacts and iCloud

January 10, 2016 / Updated: January 14, 2017 / Lena Shore
Filed under: Address Book, iPad, iPhone, Macintosh, Productivity, Tutorials
We are a two-person household. Each of us has iPhones, Macs, and iPads, so it makes sense that we would want to share the same Contacts/Address book. We tried having separate Contacts, but someone will update something and the other won’t have it — and it’s a hassle. So, then we tried just sharing the same Contacts with iCloud and it was worse:
- Your devices forget who you are
- Your iMessages starts using the wrong email
- Your icon is wrong
- Your iPhone doesn’t know where “home” is anymore.
- …and many many other irritating things that will make you pull your hair out.
The problem is that as soon as you share your Contacts (Address Book), your address book can only mark one person as “you”. This cascades down into all kinds of identity problems for your computer, iMessages, iPhones, and other devices. And, as far as I know, there is no therapy for electronics. So, one person in the household is happy and the everyone else is hella-irritated because their iPhone can’t tell them how to get home or why their messages are only coming to their computer and not on their other devices.
After a lot of trial and error, I figured out a great way to do it. It takes a bit to set up, but is very worthwhile.
Overview
- Single-Family-Member-iCloud-Account: Each family member has their own iCloud account ([email protected], [email protected], [email protected], etc.). This account will keep your identities straight. This Contact will have:
- Family members that will be sharing the new shared family address book
- No other addresses
- Shared-Family-iCloud-Account: You will create a single shared family iCloud account ([email protected]). This account is the one that will be synced across all devices and can be updated by anyone. This Contacts will have:
- NO shared family members
- All other addresses
- Each device in your family will be connected to both the Single and Shared iCloud accounts. Combined you will have all your addresses.
Step 1: Get prepared
This whole thing is going to go a lot easier if you have everyone’s computers, iPhones, iPads, etc. available so you can get it all done at once. It’s not necessary – but it will make it go faster and easier.
If your household is anything like mine – good luck trying to find an hour when someone isn’t using one of their devices. Maybe you can do it at 3 a.m.
Step 2: Create a new Apple ID just for your family address book
- You’ll need an email address for your new iCloud account – one you aren’t already using for any other Apple ID. I got a freebie one through gmail that I only intend on using for sharing my address book. But, you could get one through any other email provider.
- Name this email something that will indicate that it is the shared, address book one. Stick the word “family” or “shared” in it so it’s really clear what you are doing with it. You’ll be happy you did this later. Example: [email protected] or [email protected]
- Go to icloud.com and sign up for your Apple ID using the email address
Step 3: Back up your addresses
- Open your Contacts app
- Highlight all of your addresses
- Drag them to your desktop to make a single VCard.
- Rinse and repeat for each family member with their Contacts app.
Step 4: Combine all the addresses
Next, we are going to create a master Address Book with Contacts. Let’s assume you are going to do this on your own computer.
- Get all the vCards on your computer (email, Airdrop, imessage, thumb drive, etc.)
- Take all the vCards you created in step two and combine them into a single address book by dragging them onto the address book on your computer. FYI: If you are on YOUR computer, no need to drag the back up you just made back into your Contacts.
Step 5: Clean up your messy addresses
You don’t have do to this now, but it will be harder to clean up later with everyone syncing everything. It’s time well spent.
- Look for Duplicates (Contacts –> Card –> Look for Duplicates) and clean up as necessary.
- If your Contacts app is a real mess, check the App Store for apps to help clean it up. I have used “Contacts Cleaner” in the past and liked it.
- When you are done, create another backup of your newly cleaned up Contacts app the same way we did in Step 2.
Step 6: Import Addresses into Your New “Shared Family iCloud Account”

- Login to your new iCloud Account (Created in Step 2)
- Go to “Contacts”
- Look for the gear in the lower right
- Import the new shiny clean backup you made in the last step.
- Search for any family members that will be sharing this account and remove them from the Contacts.
Step 7: Prepare your Local Address book for Import
- Launch the Contacts app on your computer.
- Delete all of your contact cards except yours and the other family members who will be sharing. It’s sounds scary – but it’s okay. Remember step 5? You have a backup!
- Highlight your card as “you”. Contacts –> Card –> Make This My Card. (Do this with everyone else’s computer too, but mark their card as them.)
Step 8: Add New Account to computer
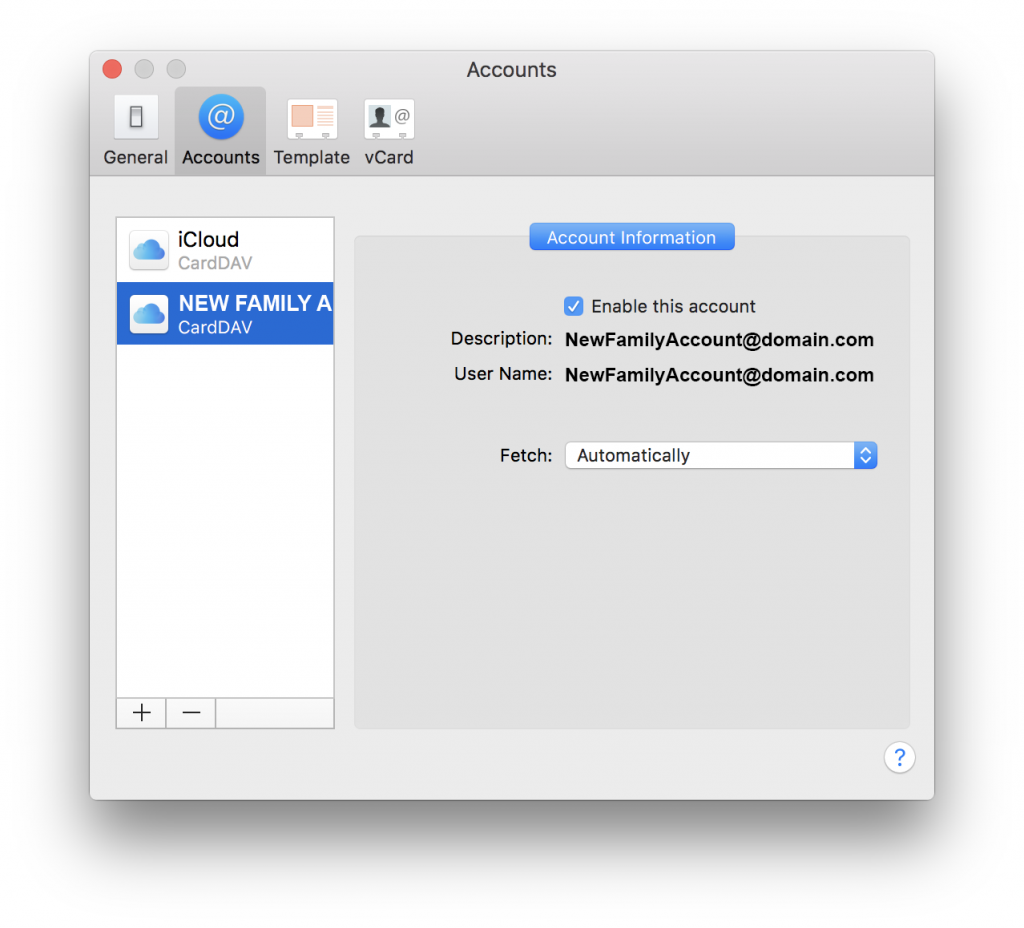
- While in Contacts go to: Contacts –> Preferences –> Accounts
- Click the “plus” symbol (+) and add your new “Shared Family iCloud Account”
- If you have been trying to share previous versions of your contacts before this tutorial (like I did) and you see remnants of them in the Accounts section, delete them.
- By now you’ll probably have to stop and reassure your family members that you are almost done and they can have their devices back soon.
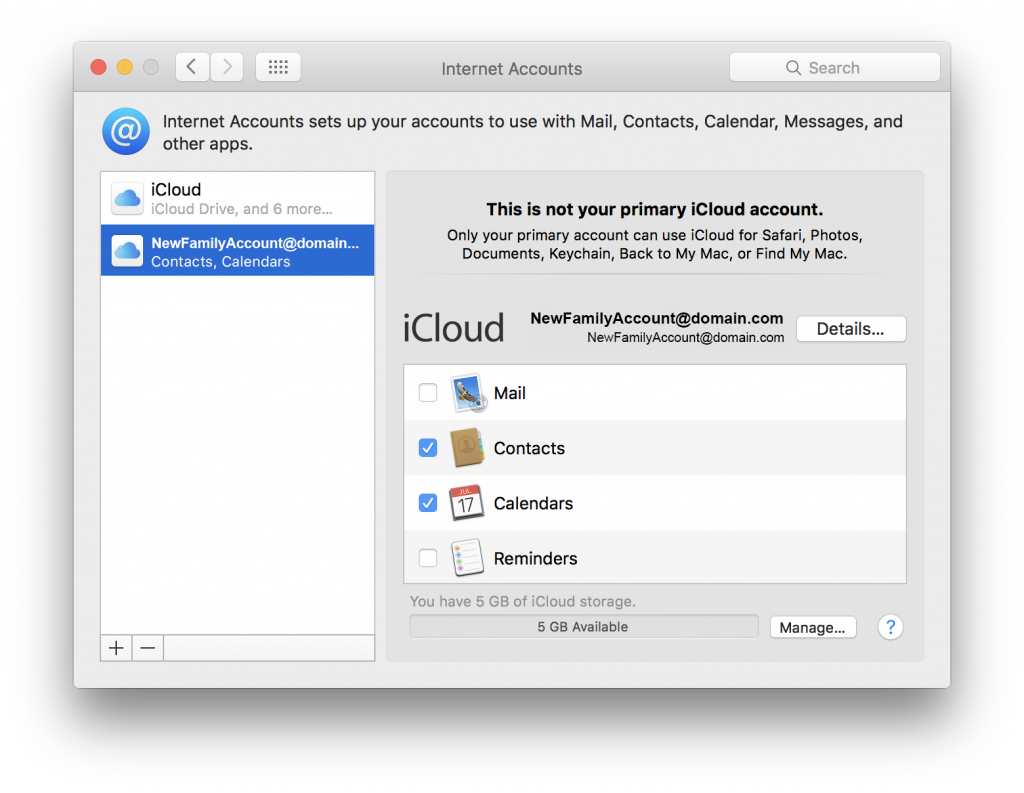
- Now go to Apple –> System Preferences –> Internet Accounts and make sure your new account is added there as well. If it isn’t, add it.
- Select the new account and make sure that only “Contacts” is checked. BONUS: you can also share a family calendar by checking the “Calendars” checkbox.
Step 9: Add New Account to iPhone and iPad
- Pick up your iPhone (or iPad) and go to: Settings –> Mail, Contacts, Calendars –> “Add Account”
- Add the new “Shared Family iCloud Account”
- As in the previous step — only activate the Contacts (and the Calendar if you want to share a calendar).
Step 10: Rinse and Repeat
- Now that you’ve done yours, you’ll need to do this on everyone else’s devices. I found it was easier to make a list of each person and their device so I didn’t forget anyone.
Step 11: Set Your Default Account (optional)
- Macintosh: Open Contacts on your computer and go to Preferences –> General –> (Select the Default Account desired)
- iOS devices (iPad, iPhone): Go to Settings –> Contacts –> Default Account

Final Notes
- If you decided to enable a shared Calendar for most things, make sure that everyone’s default Calendar is the new Shared Family Calendar
- You might also consider deleting other unused calendars. This is what we did as we were happy sharing everything on one calendar.
- If you have been trying to share before and it wasn’t working out, you may have remnants of old sharing attempts on your machine, iPhone, etc. Go ahead and delete those. You don’t need them and they can only cause problems in the future.
- If you don’t see your items updating on your phone immediately, you can check your Push/Pull settings; You can also add a blank entry to force your Contacts to sync.
Step 11: Go have a beer
- You deserve it!
Does this work with shared email?
If you mean two people who share the same address on different computers… I guess it would. You could just name each person’s entry with their name, yet share the same address.
Hi Lena, I was so happy to find your article “ Create a Shared Family Address Book with Contacts and iCloud”. I have been struggling for months trying to figure out a way to share contacts with my wife. Your instructions are very clear. Thank you for taking the time to put this all together. I did get stuck on step 8. When I try to add my new family iCloud account, I got a pop-up saying “account unavailable”. Do you think it’s something that I am doing wrong? Or did Apple just change something that’s stopping me from adding another iCloud count.
I appreciate any help you can offer.
On a sidenote, I was a graph designer for 30 years and A professor of graphic design for 10 years. I loved every minute of it 🙂
With thanks,
Brian
Hey Brian! I’m so glad the article helped you. It was such a thing to figure out (that I also wanted desperately) I wanted to share it with everyone who wanted the same thing.
I am just guessing on your “account unavailable” problem – but I don’t think Apple changed anything. I have several accounts. I would make sure that you haven’t already added that account. And also make sure there aren’t any trailing spaces when you enter the email. And, make sure you are adding your iCloud account vs the Gmail (or other 3rd party) account you used to make an iCloud account (I’ve done that before and really confused myself).
That’s wonderful to hear you were a designer and teacher. I have often thought of teaching and wondered if I would enjoy it. Sounds like I might!
Lena
(: