How to add an album to a page in WordPress using NextGEN Gallery
Updated: January 23, 2013 • By Lena Shore
Filed under: Wordpress
In this tutorial I will show you how to add an album using existing galleries to a page or post in WordPress, using NextGEN Gallery plugin. This tutorial assumes you already have some galleries created. If you do not, you can go to Gallery –> Add Gallery/Images area of NextGEN to create them and upload images.
Create an album
STEP 1: Login to your WordPress site and make sure you have NextGEN Gallery 1.9x or later.
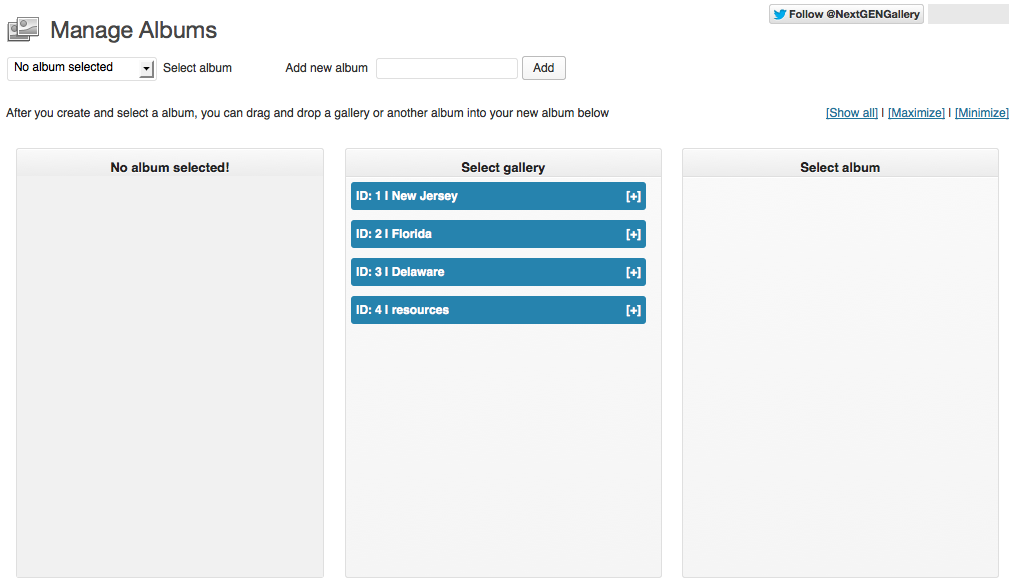
STEP 2: Go to Gallery –> Album. You will see there are already four galleries in the middle column in my example.

Album area before any albums have been created.
STEP 3: Create your first album by filling in the “Add new album” area and click “Add”. I will be using the name “testalbum” but you can name it whatever you’d like. You will see your new album appear on the right as an orange tablet.
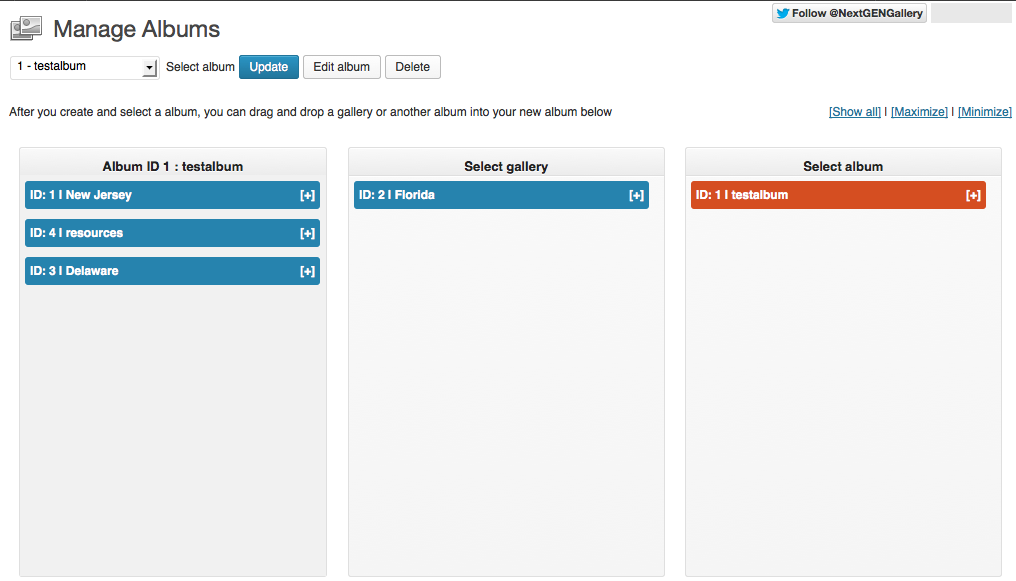
STEP 4: Go to the Dropdown called “Select Album” and select the album you just created from the dropdown. Notice that the empty left field now says “Album ID X: testalbum”.

Album area with album selected
STEP 5: After you create and select an album, you can drag and drop a gallery tablet (from the middle column) or another album tablet (from the right column) into your new album area. When you are done, populating your album, click the “Update” button to save.

Galleries have been dragged from the center column to the left column
Place an album on a page
STEP 1: Go to the editing area of the page or post you would like to place the album on.
STEP 2: Place your cursor where you’d like the album to appear.
STEP 3: Click the “Add NextGEN Gallery” icon in the toolbar.

Notice the NextGEN icon highlighted in yellow
STEP 4: Go to the “Album” tab.5. Select your album from the dropdown menu and choose “extended version” or “compact version” and select the “Insert” button.

Inserting an album from the page editing area after you select the NextGEN icon
STEP 5: Save your page and view your results. The image below has both samples of the album (extended and compact).

Final results two ways – Expanded (top) and Compact (bottom)