Mambo: Quick Start Guide

September 11, 2009 / Updated: September 11, 2009 / Lena Shore
Filed under: Tutorials
Mambo can be a little daunting for new users. There are a lot of options and everything is isn’t always clear. The trick is that there are only a few things you really need to know to manage your site… you just need to learn where they are.
Here is a quick start for the most common tasks you’ll need to take care of to manage your Mambo site.
Login
Most login paths will be www.yourdomainname.com/administrator. If that doesn’t work, speak to your administrator or ask your hosting company.
Change your profile information
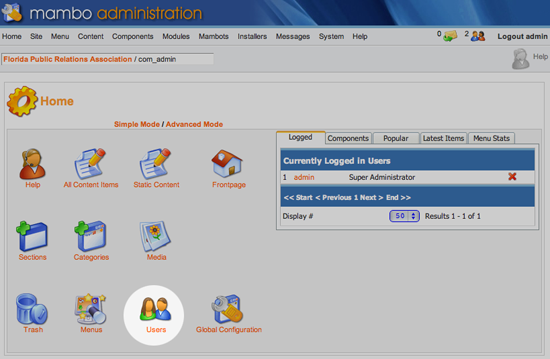
After clicking on the User icon…
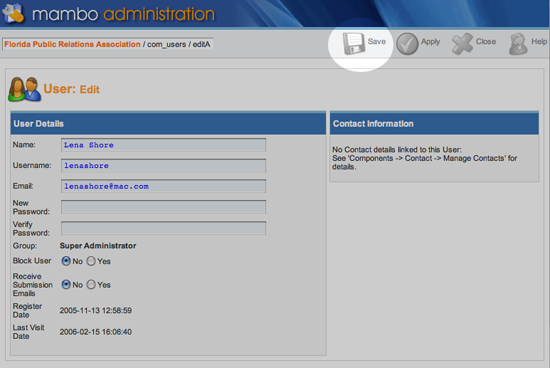
you can choose your name from a list and make changes to your name, email address, etc. Don’t forget to hit save when you are done.
Menu Items
Mambo has several different versions of menus that are all dependent on the way it was created and the template that was used. There are main menus, top menus, user menus, and other menus. Your site may use all, one, or somewhere in between. It’s easy enough to click on the different ones to see where your menus are listed. If it’s empty, you aren’t using it. If it has a list of pages, you are. Easy deduction, right?
Columns and their meanings
- Menu item: This is the name of your page. You can also see that some pages will be indented to show they are subpages. You can click on the menu item page name to change that page’s “parent”. This means if you tell page “board members” to have a parent of “contact” then when you view the site, “board members” will show up as a sub-page of “contact”.
- Published: This shows whether a page is published (showing to visitors of your website) or unpublished (hidden from web site visitors). Reasons for hiding pages might be that they are being edited or not ready for public viewing yet.
- Reorder: You can use the little arrows in the “Reorder” column to reorder the navigation of your site.
- Order: This does the same thing as the “reorder” column, but you manually type numbers into the little boxes. The lower the number, the higher up the navigation it will appear in relation to the other numbers.
- Access: Who can see the page. Public is generally any visitor to the website. Registered means you have to be logged in and registered to the site. There is also a special category that you can define.
- Item ID: Every time you create a new page it gets assigned an ID number. (Most people will not need to know about this.)
- Type: This is your cheat sheet to what type of item your page is on. You can click on those links and go straight to the page you want to edit.
- CID: This shows the “component” for this specific Menu Item in the database. (Also not an item for most users.)
Edit Content
Most content is under the Content menu.
Their are two ways to get to the list of pages you can edit. The first is to do it through your menu list. The other is a to go to the section that your page resides in. If you wanted to select static page content, you would go to Menu –> Static Content Manager. From there, you can choose your page and make your changes.
Add a new static content page
While in the Static Content Manager (Menu –> Static Content Manager):
- Click “New”.
- Enter the your Title (the one that shows on the page) and the Title alias. (The one that will show in the menu.)
- Now type your copy and format the way you want using the tools. You’ll note they are similar to Microsoft Word.
- Publishing: On the right side of the page, you will see some additional information. This area controls where your page is “published” (viewable to public), what access level you want, and the date you want the page to be published. This last item is great if you are trying to schedule publications in a timely manner and don’t want to post them too soon.
- Link to Window: this will allow you to add a link in your navigation. Just choose the menu you want the new link to belong to, give it a name, and click “link to menu”.
- Save your changes.
Using images
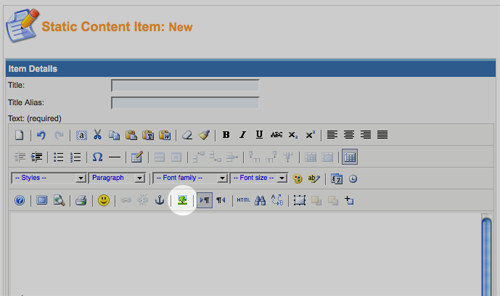
While creating or editing a static page, you may want to add an image. Notice a very small green icon that has a tree in it. That is the insert image button.
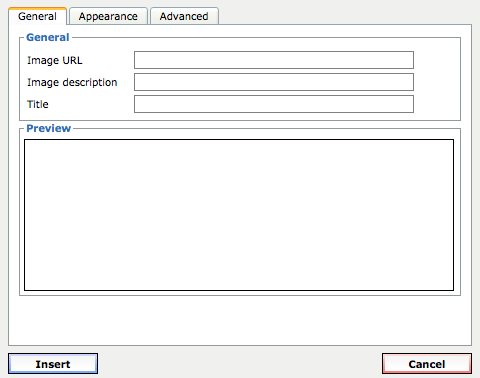
After you click it, you will see a new window with all kinds of options for naming your images, the way you want it to look, etc.
The most important piece of information to fill out is in the “Image URL”. Here is how you get that information:
Go to “Home” and click on “Media Manager”. You can select and create folders from here as well as upload new items. After you have found/uploaded the image you want to use, you can click on it. Notice that the “code” section has been populated with code for you. Copy and paste that.
Now, go back to the page you want to add the image to and paste that code into the “Image URL” section we discussed earlier.


For the record: I thought you were going to teach me to dance. :tongue:
LOL. Nope.